

Noticing fuel dripping under the carburetor, wet spots along the fuel line, or a strong gasoline smell around your machine can be concerning. When your snow blower leaking gas problem appears, the source may be the carburetor, primer bulb, fuel line, or tank. At BlueStars Parts, we help you identify common leak points and find the right replacement parts to restore safe, reliable operation.
Quick Diagnosis: Why Is Your Snow Blower Leaking Gas?
Check where the gas is leaking from to find the most likely cause.
| Symptom | Likely Cause | Quick Check |
|---|---|---|
| Gas leaks from the carburetor bowl seam | Worn bowl gasket or seal | Inspect the bowl seam. |
| Gas drips continuously from the carburetor or intake area | Stuck float or needle valve | Check the float and needle. |
| Fuel wets the hose or connection between the tank and carburetor | Cracked fuel line or loose connection | Inspect the hose and fittings. |
| Fuel leaks from the primer bulb | Cracked or brittle primer bulb | Check the bulb for cracks. |
| Fuel drips from the tank or tank outlet | Cracked tank, fitting, or faulty shut-off valve | Inspect the tank and outlet. |
| A few drops appear only immediately after excessive priming | Temporary flooding from over-priming | Stop priming and observe. |
1. What's Causing Your Snow Blower to Leak Gas?
Understanding the cause of a snow blower leaking gas is important for identifying the right solution and preventing further fuel loss or safety risks. Below are seven common causes that may lead to gas leaks in a snow blower.
1.1. Over-Priming Can Cause Temporary Fuel Drips
Pressing the primer too many times can send excess fuel into the carburetor and temporarily flood the engine. This may cause a few drops of gasoline to appear around the carburetor or intake area immediately after priming. Unlike a true fuel-system leak, this type of dripping usually happens only after excessive priming and does not continue steadily while the snow blower is sitting.
1.2. Stuck Carburetor Float or Needle Valve
The carburetor float and needle valve work together to control how much fuel enters the carburetor bowl. If the float sticks or the needle valve cannot seal properly, fuel may continue flowing into the bowl until it overflows.
This often causes continuous dripping from the carburetor or intake area. For compatible models, BlueStars Parts offers the 951-12705 / 951-10974A Snow Blower Carburetor Assembly as a replacement option, designed for selected Troy-Bilt, MTD, and Cub Cadet models, including Troy-Bilt Storm 2410/2620, Squall 2100, and Cub Cadet 524SWE. It helps restore proper fuel delivery to 179cc and 208cc engines, supporting smoother starting and engine performance.
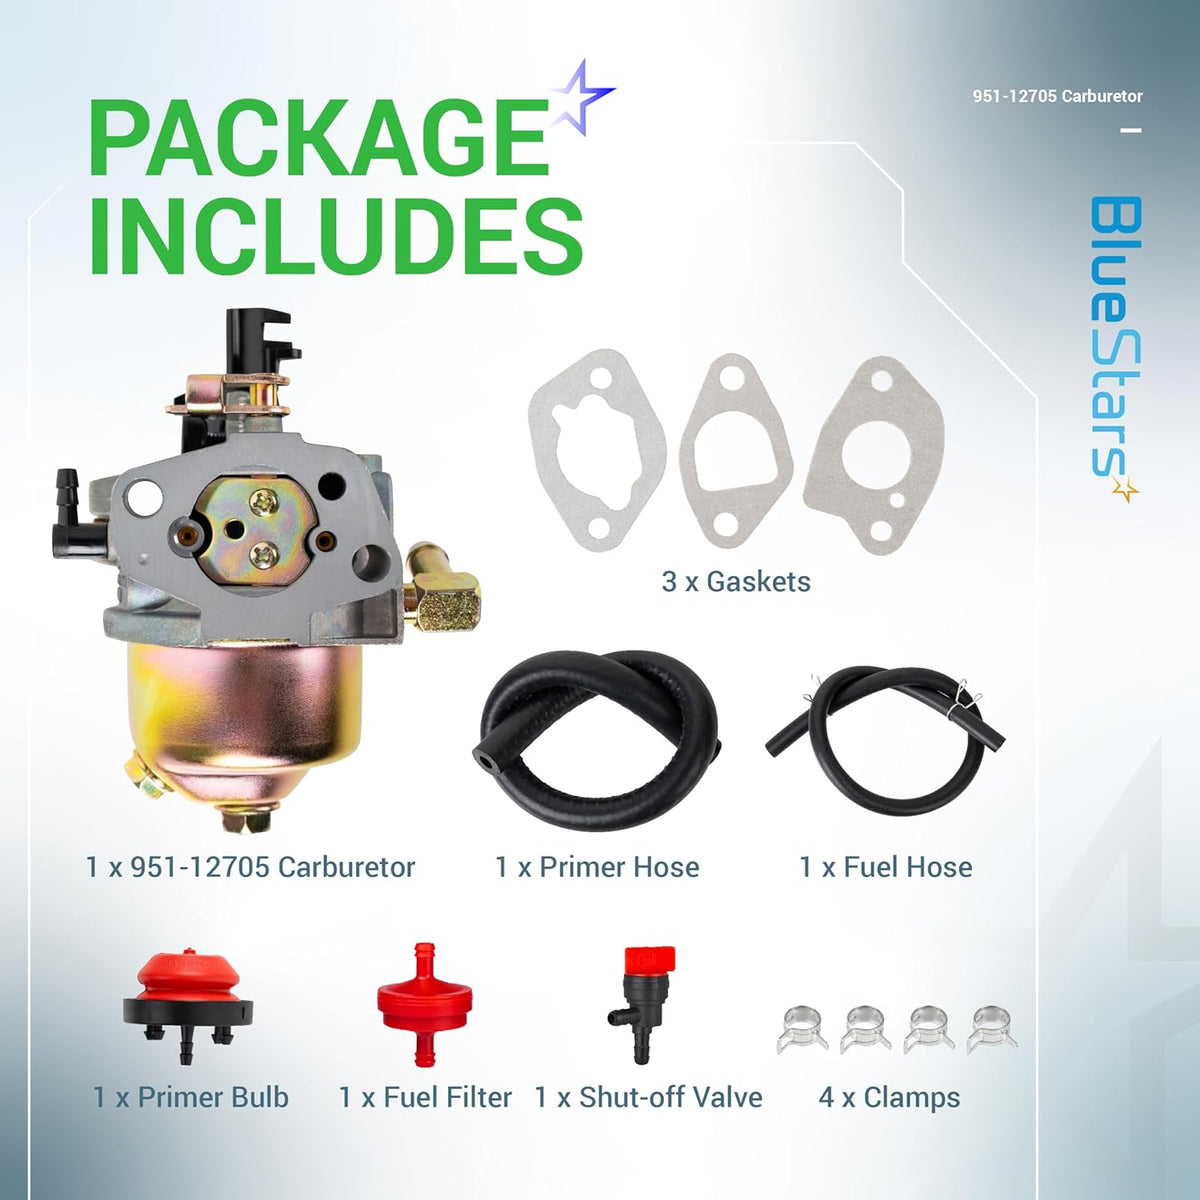
The 951-12705 carburetor from BlueStars Parts (Source: BlueStars Parts)
1.3. Worn Carburetor Bowl Gasket or Bowl Seal
The carburetor bowl gasket creates a tight seal between the fuel bowl and carburetor body. Over time, the gasket can flatten, harden, crack, or lose its ability to seal properly. When this happens, fuel commonly appears around the seam at the bottom of the carburetor bowl rather than leaking from the intake or fuel line.
1.4. Damaged or Fuel-Logged Carburetor Float
A damaged float can crack or absorb fuel, making it heavier and less buoyant. As a result, it may stay too low inside the bowl and fail to close the needle valve at the correct fuel level. This allows the carburetor to overfill and may lead to continuous leaking or dripping around the carburetor.

A damaged float can crack or absorb fuel (Source: BlueStars Parts)
1.5. Cracked or Worn Fuel Lines
Fuel lines can become stiff, brittle, loose, or cracked as they age. Exposure to gasoline, vibration, and cold temperatures can gradually weaken the hose material. A damaged fuel line often leaves wet spots along the hose or around the connection between the fuel tank and carburetor.
1.6. Brittle or Cracked Primer Bulb
Primer bulbs can deteriorate after repeated exposure to fuel, cold weather, and regular use. The rubber may become brittle, split, or develop small cracks that allow gasoline to seep out. If fuel is leaking directly from the primer area, a damaged bulb may be the cause.
BlueStars Parts offers the 570682A / 951-10639A Primer Bulb for compatible MTD, Tecumseh, Cub Cadet, Craftsman, Troy-Bilt, and Ryobi snow blowers, including Tecumseh HMSK80, HMSK100, HMSK110, and LH318SA engines. It helps deliver fuel directly to the carburetor for easier cold starts and more reliable engine starting.
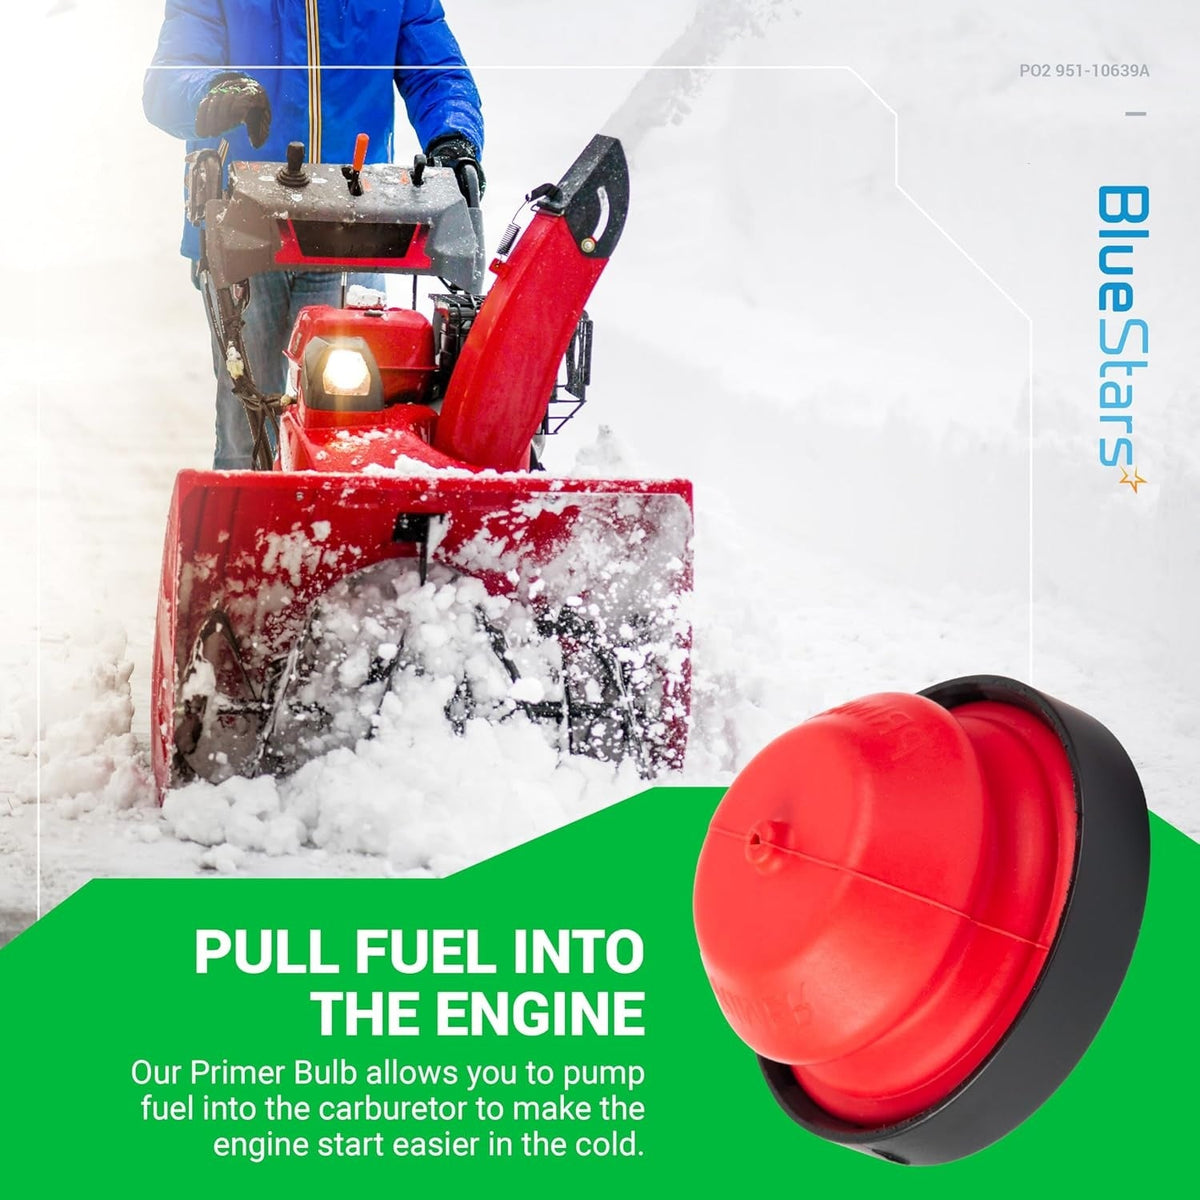
The 570682A / 951-10639A primer bulb is a compatible replacement for selected models (Source: BlueStars Parts)
1.7. Cracked Fuel Tank, Tank Fitting, or Faulty Shut-Off Valve
A cracked fuel tank or damaged tank outlet can allow gasoline to drip directly from the upper fuel-system area. Leaks may also develop around the tank fitting where the fuel line connects. A worn or faulty fuel shut-off valve can also allow fuel to seep through even when the valve is supposed to be closed, causing persistent dripping near the tank or fuel outlet.
2. How to Troubleshoot and Fix a Snow Blower Leaking Gas
Never start or continue using a snow blower while fuel is actively leaking. Below are seven steps to help you safely locate the source of the leak and fix a snow blower leaking gas.
Step 1: Stop the Engine and Shut Off Fuel
Turn off the engine, remove the key, and allow the machine to cool completely. Close the fuel shut-off valve if your snow blower has one. If there is no valve, follow the owner's manual before disconnecting or servicing any fuel components. Wipe up spilled gasoline and wait until the vapors have cleared before continuing.
Step 2: Dry the Area and Find the Highest Wet Point
Wipe the carburetor, fuel line, primer bulb, tank, and surrounding surfaces completely dry. Then watch for fresh fuel and trace the wet area upward to the highest point where gasoline first appears. This helps separate the actual leak source from fuel that has simply run down onto lower components.

Trace the wet area upward to locate where fresh fuel first appears (Source: BlueStars Parts)
Step 3: Check the Fuel Line, Tank, and Primer Bulb First
Inspect the fuel hose and connections for cracks, stiffness, loose clamps, or wet spots. Check the primer bulb for splits and examine the tank, cap, outlet fitting, and shut-off valve for leaks. Replace cracked fuel lines or damaged components; a cracked fuel tank should be replaced rather than repaired.
Step 4: Inspect the Carburetor Bowl Seam
Dry the carburetor and watch the seam between the fuel bowl and carburetor body. If fresh gasoline forms around this joint, inspect the bowl gasket or seal for damage, flattening, or incorrect installation. Replace the damaged seal and make sure the bowl is correctly seated before checking again for leaks.

Check the seam between the fuel bowl and carburetor body (Source: BlueStars Parts)
Step 5: Check the Float and Needle Valve
Remove the carburetor bowl according to the owner's manual, place a drain pan underneath to catch any fuel, and keep the work area away from open flames, sparks, or other ignition sources. Wipe up any spilled gasoline immediately, then inspect the float, hinge, needle, and needle seat.
Make sure the float moves freely and is not cracked or filled with fuel. Check the needle tip and seat for dirt, wear, or damage that could prevent the valve from closing completely.
Step 6: Clean or Replace the Carburetor if Needed
Clean dirt, varnish, and deposits from the carburetor passages, float, needle, and bowl using the procedure recommended for your engine. Reassemble the carburetor and check carefully for leaks. If the carburetor has severe corrosion, physical damage, or parts that cannot seal properly after cleaning, replacement may be the better option.

Reassemble the carburetor and check carefully for leaks (Source: BlueStars Parts)
Step 7: Check the Engine Oil Before Restarting After a Major Carburetor Overflow
On a 4-cycle engine, check the dipstick before restarting if a stuck float or needle caused a major carburetor overflow. An unusually high oil level, thinner-than-normal oil, or a strong gasoline smell may indicate that fuel has entered the crankcase. Do not restart the engine until the carburetor problem has been corrected and any fuel-contaminated oil has been properly serviced according to the engine manual.
3. When Should You Call a Professional?
Stop using the snow blower and consider professional service if:
- Gas continues leaking after checking the fuel line, primer bulb, bowl gasket, float, and needle valve.
- Fuel is leaking heavily or repeatedly from the carburetor or intake area.
- The carburetor is cracked, badly corroded, or requires internal repairs beyond basic cleaning.
- The fuel tank, shut-off valve, or tank fitting is damaged and cannot seal properly.
- Gas has entered the engine oil after a major carburetor overflow.
- You are unsure how to safely disassemble or repair the fuel system.
- If fuel contacts a hot engine or you notice a strong gasoline odor in an enclosed space, stop work, avoid ignition sources, and move to a safe, well-ventilated area. If there are flames, move away and contact emergency services.

Stop using the snow blower and seek professional service when a fuel leak cannot be safely resolved (Source: BlueStars Parts)
4. How to Prevent Your Snow Blower From Leaking Gas
Regular fuel-system checks can help catch worn or damaged components before they develop into larger leaks.
- Inspect fuel lines, fittings, and clamps regularly for cracks, deterioration, or loose connections.
- Check the primer bulb, carburetor bowl, fuel tank, and shut-off valve for early signs of damage or seepage.
- Avoid excessive priming and follow the starting procedure in your owner's manual.
- Use fresh gasoline and avoid leaving old fuel in the system for extended periods.
- Follow the manufacturer's instructions for fuel stabilizer or draining the fuel system before long-term storage.
- Close the fuel shut-off valve when the machine is not in use, if your model has one.
5. FAQs: Snow Blower Leaking Gas
5.1. Is It Normal for a Small Amount of Gas to Leak After Priming the Engine?
A few drops may appear immediately after excessive priming because too much fuel can flood the carburetor. However, fuel should not continue dripping once you stop priming; a persistent leak may indicate a carburetor or fuel-system problem.
5.2. Can I Temporarily Patch a Cracked Fuel Line Instead of Replacing It?
No. A cracked fuel line should be replaced rather than patched because gasoline and its vapors are highly flammable. Use the correct fuel-rated replacement hose and secure it properly with suitable clamps.
5.3. Is It Safe to Keep Using a Snow Blower That's Leaking Gas?
No. Stop the engine and do not restart the snow blower while gasoline is actively leaking. Fuel and gasoline vapors can ignite, so the leak should be located and repaired before the machine is used again.
5.4. How Do I Know if the Leak Is From the Carburetor Bowl or the Fuel Line?
Dry the area first, then watch where fresh fuel appears. Wetness around the carburetor bowl seam points toward the bowl or its gasket, while fuel along the hose or fittings usually indicates a fuel-line or connection leak.
5.5. How Do I Find the Right Carburetor or Primer Bulb for My Snow Blower Model?
Find the model and serial number on your snow blower and, when required, the engine model information. Use those numbers in the manufacturer's parts diagram to identify the correct part number, then confirm compatibility before ordering a carburetor or primer bulb.
If your snow blower is leaking gas, finding the source early can help prevent fuel loss, engine issues, and safety risks. Replace worn or leaking fuel-system components before operating the machine. For compatible replacements, browse Snow Blower Parts from BlueStars Parts and verify your machine model and original part number before ordering.
Contact Information
8 The Green, Ste A, Dover, Delaware 19901-3618, United States
Website: https://bluestarsparts.com/
References
Briggs & Stratton. (2026, April 6). How do you rebuild or overhaul a small engine carburetor? https://www.briggsandstratton.com/en-us/support/faqs/carburetor-rebuild
Ariens. (2023, March 7). How to store your snow blower. https://www.ariens.com/en-us/company/blog/311/how-to-store-your-snow-blower


