

When dealing with a refrigerator not making ice, you may notice an empty ice bin, tiny ice cubes, or a dispenser that clicks but drops nothing. The cause can be as simple as a wrong setting, blocked water flow, poor freezing, or a faulty ice maker part. In this guide, BlueStars Parts walks you through the troubleshooting process from quick, no-cost checks to component-level repairs.
Refrigerator Not Making Ice: Causes & Quick Fixes
| Common Cause | Key Sign | Quick Fix |
|---|---|---|
| Ice maker is turned off | Ice maker is silent; bin stays empty | Turn it ON and check the shutoff arm |
| Freezer is too warm | Water freezes slowly or ice is soft | Set freezer near 0°F (-18°C) |
| Clogged water filter | Weak dispenser flow; small or hollow ice | Check, reseat, or replace the filter |
| Restricted water supply | Ice tray is dry; dispenser flow is weak | Open the valve and straighten the water line |
| Frozen fill tube | Water reaches fridge but not the ice tray | Safely thaw and inspect the fill tube |
| Faulty inlet valve | Little or no water enters the ice maker | Inspect and test the inlet valve |
| Bin, door switch, or sensor issue | Ice maker pauses even when the bin is not full | Reinstall the bin and check sensors/switches |
| Ice maker assembly failure | Ice freezes but does not eject | Run diagnostics and replace the failed part if confirmed |
1. Refrigerator Not Making Ice: Quick Diagnosis
Before replacing any refrigerator part, identify exactly what the ice maker is doing.
Start with these quick checks:
- Make sure the ice maker is switched ON.
- Confirm the freezer temperature is around 0°F (-18°C).
- Check whether the refrigerator water dispenser is working normally.
- Make sure the water supply valve behind the refrigerator is fully open.
- Inspect the water line for kinks or damage.
- Check whether the ice tray contains water or frozen ice.
- Make sure the ice bin is installed correctly.
- Look for visible ice blocking the fill tube.
A useful way to narrow down the problem is to look inside the ice tray.
- Tray is completely dry: focus on the water supply, filter, fill tube, or inlet valve.
- Water is in the tray but does not freeze: check freezer temperature and cooling performance.
- Ice is frozen in the tray but does not eject: the problem may involve the ice maker motor, sensor, or internal module.
This symptom-based approach helps avoid replacing parts that are still working.
2. Common Causes of a Refrigerator Not Making Ice
A refrigerator may stop making ice because the ice maker is turned off, the freezer is too warm, water flow is restricted, or an internal component has failed. Start with the simplest checks before replacing any parts.
2.1 Ice maker is turned off or paused
The ice maker cannot produce ice if its power switch, shutoff arm, or control-panel setting is in the OFF position. This can happen accidentally after cleaning the freezer, removing the ice bin, or changing refrigerator settings.
2.1.1. Signs the Ice Maker Is Turned Off or Paused
- The ice maker does not start a cycle.
- The ice bin remains empty even though the freezer is cold.
- A wire shutoff arm is raised or positioned incorrectly.
- The control panel shows the ice maker as OFF.
- No water enters the ice tray because the ice-making cycle never starts.
Depending on the refrigerator model, the ice maker may use a physical switch, wire shutoff arm, sensor, or digital control rather than the same universal ON/OFF mechanism.
2.1.2. How to Fix
- Step 1: Locate the ice maker power switch, shutoff arm, or ice maker setting on the refrigerator control panel.
- Step 2: Confirm that the ice maker is set to ON and that any wire shutoff arm is in the operating position.
- Step 3: Make sure the ice bin is fully seated and is not interfering with the shutoff arm or sensor.
- Step 4: If the ice maker is already on, check the owner's manual for a model-specific test or reset procedure.
- Step 5: After restoring operation, allow the refrigerator enough time to complete a new ice-making cycle before continuing troubleshooting.
Note: Reset procedures vary by refrigerator model. Some units have a dedicated test/reset button, while others use a control-panel sequence or power cycle. You should follow the instructions for your specific model rather than applying a universal reset method.

Step-by-step checks to turn the ice maker back on and restore normal ice production.
2.2 Freezer Temperature Is Too Warm
An ice maker needs a sufficiently cold freezer to freeze water and complete its harvest cycle. If the freezer temperature is too high, ice production may slow down or stop even when frozen food still appears adequately cold.
Whirlpool recommends a freezer setting around 0°F (-18°C), while Maytag and KitchenAid identify approximately 0°F to 5°F as an appropriate range for ice production.
2.2.1. Signs the Freezer Is Too Warm
- Ice production becomes noticeably slower.
- The ice tray contains water that takes unusually long to freeze.
- Ice cubes are soft or partially frozen.
- The freezer temperature is above the manufacturer's recommended range.
- The freezer has poor airflow because vents are blocked or the compartment is overpacked.
2.2.2. How to Fix
- Step 1: Check the freezer temperature using the built-in display or an appliance thermometer.
- Step 2: Set the freezer to around 0°F (-18°C) unless the refrigerator manufacturer specifies otherwise.
- Step 3: Check that food packages are not blocking interior air vents.
- Step 4: Avoid overpacking the freezer so cold air can circulate properly.
- Step 5: Check that the freezer door closes completely and the gasket seals properly.
- Step 6: Allow the freezer temperature to stabilize before checking ice production again.
If the freezer consistently remains warmer than its set temperature, troubleshoot the cooling issue before replacing the ice maker.
Note: Frequent door openings, blocked airflow, or an overloaded freezer can raise internal temperature and interfere with ice production.
>> Related guide: Why Is My Refrigerator Too Warm? 7 Causes and Fixes
2.3 Water Filter Is Clogged or Installed Incorrectly
A clogged or incorrectly installed refrigerator water filter can restrict water flow to the ice maker. When too little water reaches the ice mold, the refrigerator may produce less ice, smaller cubes, or no ice at all.
Maytag states that a clogged or incorrectly installed filter can reduce water flow to both the dispenser and ice maker. Some manufacturers recommend replacing the filter approximately every six months, although the exact interval depends on the refrigerator model, usage, and water quality.
2.3.1. Signs of a Clogged or Incorrectly Installed Water Filter
- Water dispenser flow is slower than usual.
- Ice production gradually decreases.
- Ice cubes become small or hollow.
- Both the water dispenser and ice maker have reduced flow.
- The issue started shortly after a new filter was installed.
- The filter has not been replaced within the manufacturer's recommended interval.
2.3.2. How to Fix
- Step 1: Locate the refrigerator water filter and check whether it is correctly seated in its housing.
- Step 2: Remove and reinstall the filter according to the manufacturer's instructions if it appears loose or improperly installed.
- Step 3: Replace the filter if it is clogged, overdue for replacement, or the filter indicator shows that service is needed.
- Step 4: Use a filter that is compatible with your specific refrigerator model.
- Step 5: Flush the water system as directed by the manufacturer after installing a new filter.
- Step 6: Check water dispenser flow again and monitor the next few ice-making cycles.
For routine care, see our refrigerator maintenance guide.
Note: Do not assume that “six months” applies to every refrigerator. Always prioritize the replacement interval stated in your owner's manual, especially where water quality or usage differs.
2.4. Water Supply Line Is Kinked, Blocked, or Shut Off
The ice maker needs a continuous water supply. If the shutoff valve is closed or the supply line is pinched, kinked, or blocked, little or no water may reach the ice tray.
Whirlpool, KitchenAid, and Maytag all identify restricted water supply as a common cause of an ice maker that stops working.
2.4.1. Signs of a Water Supply Problem
- The ice tray stays completely dry.
- The water dispenser also stops working or has weak flow.
- Ice production decreases after the refrigerator has been moved.
- The water line behind the refrigerator appears bent, pinched, or damaged.
- The household shutoff valve is partly or fully closed.
2.4.2. How to Fix
- Step 1: Confirm that the refrigerator's water supply valve is fully open.
- Step 2: Unplug the refrigerator before moving it away from the wall.
- Step 3: Carefully pull the appliance forward and inspect the entire accessible water line.
- Step 4: Straighten any minor kinks or bends without crushing or sharply folding the tubing.
- Step 5: Check for leaks, damaged tubing, or loose connections.
- Step 6: Reposition the refrigerator without pushing it tightly enough against the wall to pinch the line.
- Step 7: Restore power and test the water dispenser and ice maker again.

Diagnostic Note: If both the water dispenser and ice maker stop working, check the shared water supply and filter before assuming that the ice maker assembly has failed.Safety Note: If the water line is damaged or leaking, shut off the household water supply before repairing or replacing the tubing.
2.5. Ice Maker Fill Tube Is Frozen
The fill tube carries water from the refrigerator water system into the ice mold. If water freezes inside this tube, the ice maker may attempt to cycle but the tray remains dry.
Whirlpool identifies a frozen water inlet tube as one possible reason water cannot reach the ice maker.
2.5.1. Signs of a Frozen Fill Tube
- The ice maker is turned on but the ice tray stays dry.
- Water reaches the refrigerator, but not the ice mold.
- Visible frost or ice appears around the fill tube.
- The ice maker attempts to operate without receiving water.
- The fill tube freezes again after being thawed.
2.5.2. How to Fix
- Step 1: Turn off the ice maker.
- Step 2: Disconnect the refrigerator from electrical power.
- Step 3: Locate the fill tube where water enters the ice maker.
- Step 4: Inspect the accessible portion of the tube for frost or frozen water.
- Step 5: Allow the frozen area to thaw safely according to the refrigerator manufacturer's instructions.
- Step 6: After the tube is clear, reconnect power and run a test cycle if the model supports one.
- Step 7: If the fill tube freezes again, investigate the water inlet valve, temperature settings, and water supply rather than repeatedly thawing the tube.
Safety Note: Do not use knives, screwdrivers, or other sharp tools to break ice inside or around the fill tube. They can puncture tubing or damage nearby refrigerator components.
Note: Whirlpool notes that a frozen inlet tube may require professional diagnosis depending on the refrigerator design and accessibility.
2.6. Water Inlet Valve Is Faulty
The water inlet valve opens when the refrigerator needs water for the dispenser or ice maker. If the valve is clogged, mechanically damaged, or electrically faulty, the ice maker may receive too little water or no water at all.
Because similar symptoms can also come from a clogged filter or restricted supply line, the inlet valve should generally be checked after simpler water-flow problems have been ruled out.
2.6.1. Signs of a Faulty Water Inlet Valve
- The ice tray remains dry even though the household water supply is available.
- Water flow from the dispenser is weak or intermittent.
- The water supply line and filter have already been checked.
- A buzzing or humming sound occurs when the refrigerator attempts to fill, but little or no water enters.
- The fill tube repeatedly freezes or water flow behaves inconsistently.
2.6.2. How to Fix
- Step 1: Confirm that the household water valve is open and the supply tubing is not kinked.
- Step 2: Check the water filter and fill tube before diagnosing the inlet valve.
- Step 3: Disconnect refrigerator power and shut off the household water supply.
- Step 4: Inspect the inlet valve and its connections for visible leaks, cracks, corrosion, or loose wiring.
- Step 5: If electrical testing is required, follow the service procedure for your refrigerator model.
- Step 6: Replace the valve only after confirming that it is defective and that the replacement part is compatible with your refrigerator.
- Step 7: Reconnect the water supply, check carefully for leaks, and test ice production.
Safety Note: Water inlet valve diagnosis may require access to electrical components and water connections. If you are not comfortable testing electrical parts, contact a qualified appliance technician.
For compatible Whirlpool, KitchenAid, and Maytag models, BlueStars offers the W10408179 Water Inlet Valve. It is designed to regulate water flow to both the refrigerator ice maker and water dispenser. It is built as a direct replacement part for reliable and consistent performance.

W10408179 Water Inlet Valve (Source: Bluestars Parts)
2.7. Door Switch, Ice Bin, or Ice-Level Sensor Is Not Registering Correctly
Many refrigerators use door switches, shutoff arms, optical sensors, or other controls to determine whether the ice maker is allowed to operate.
If the refrigerator incorrectly detects an open door, full ice bin, or improperly positioned bin, ice production may pause even though the freezer and water supply are otherwise working.
2.7.1. Signs of a Door Switch, Ice Bin, or Sensor Problem
- The ice maker stops even though the ice bin is not full.
- Ice production changes after the ice bin is removed and reinstalled.
- The ice bin does not sit correctly in its normal position.
- The shutoff arm appears stuck or obstructed.
- Ice or food blocks an ice-level sensor.
- The refrigerator displays an ice maker or sensor-related error indication.
2.7.2. How to Fix
- Step 1: Remove the ice bin and check for clumped ice, food, or debris around its mounting area.
- Step 2: Reinstall the bin fully in its correct position.
- Step 3: Check the shutoff arm or ice-level sensor for obstruction.
- Step 4: Make sure the freezer or refrigerator door closes completely.
- Step 5: Inspect an accessible door switch for visible damage or sticking.
- Step 6: Check the owner's manual for model-specific sensor or diagnostic procedures.
- Step 7: If a sensor or control board is confirmed defective, replace it with a compatible part.
Note: Sensor design varies significantly by refrigerator. Do not assume every refrigerator uses an infrared ice-level sensor or a separate sensor control board.
For compatible refrigerators, the 4389102 W10757851 Refrigerator Ice Maker Sensor Control Board Kit includes both the infrared emitter and receiver boards. It helps the ice maker correctly detect whether the ice bin is full or empty, supporting normal ice production and preventing overfilling. The kit is designed to replace several common original part numbers and supports selected Whirlpool, Kenmore, KitchenAid, Maytag, and Jenn-Air models.
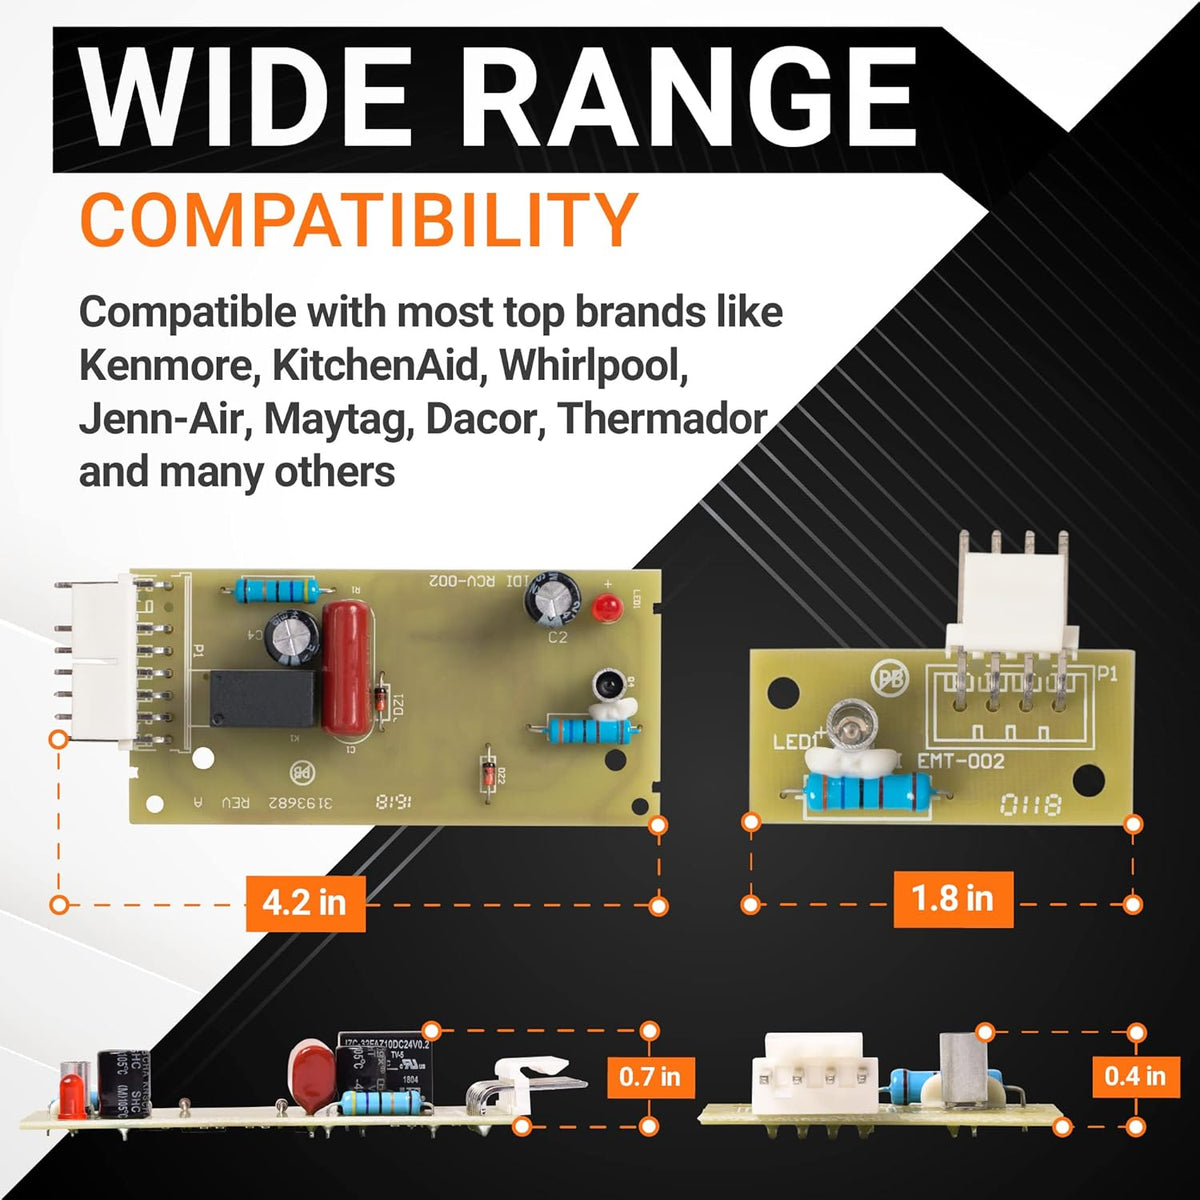
4389102 W10757851 Refrigerator Ice Maker Sensor Control Board Kit
2.8. Ice Maker Assembly or Internal Module Has Failed
f the ice tray receives water and the water freezes normally but the cubes are never released into the ice bin, the fault may be inside the ice maker assembly.
Depending on the refrigerator design, the assembly may use a motor, temperature sensor or thermostat, heater, ejector mechanism, and electronic controls to complete the harvest cycle.
2.8.1. Signs of a Faulty Ice Maker Assembly
- Ice freezes in the tray but does not drop into the bin.
- The ejector mechanism does not move.
- The ice maker repeatedly stops partway through a cycle.
- A model-specific ice maker diagnostic test fails.
- The ice maker receives water and the freezer temperature is correct, but no ice is harvested.
- The basic water-supply and sensor checks have already been completed.
2.8.2. How to Fix
- Step 1: Confirm that the ice maker is switched on and the freezer temperature is within the recommended range.
- Step 2: Verify that water is entering the ice mold normally.
- Step 3: Check that the fill tube, water filter, inlet valve, ice bin, and sensors are not causing the symptom.
- Step 4: Run the refrigerator's model-specific ice maker test or diagnostic mode if available.
- Step 5: Disconnect refrigerator power before accessing the ice maker assembly or its wiring.
- Step 6: Inspect accessible connectors and mechanical parts for visible damage.
- Step 7: If diagnostic testing confirms an internal ice maker failure, replace the failed component or complete ice maker assembly according to the refrigerator's service instructions.

Steps to diagnose an ice maker assembly failure and replace the faulty component when needed.
You can browse refrigerator replacement parts and search by original part number or refrigerator model.
Important: Do not replace the entire ice maker simply because the refrigerator is not producing ice. Rule out temperature, water supply, filter, fill tube, and control issues first. A reset may resolve a temporary cycle interruption, but it will not repair an underlying supply or hardware failure.
Safety Note: If diagnosis requires live-voltage testing, disassembling sealed electrical components, or working with wiring you are not familiar with, stop troubleshooting and contact a qualified appliance technician.
3. Refrigerator Not Making Ice vs. Not Dispensing Ice
A refrigerator that is not making ice is different from one that is making ice but not dispensing it. Identifying the symptom first helps narrow down the faulty system and avoid replacing the wrong part.
| Check | Not Making Ice | Making Ice but Not Dispensing |
|---|---|---|
| Main symptom | Ice bin is empty | Ice bin has ice |
| Likely issue | Ice-making system | Dispensing system |
| Common causes | Water supply, filter, fill tube, inlet valve, sensor, ice maker | Ice clumps, blocked chute, flap, auger, dispenser motor |
| Check first | Ice maker ON, 0°F freezer, water flow | Ice clumps, chute, auger movement |
| Useful clue | Dry tray = water-flow issue | Full bin + no movement = dispenser issue |
| Possible parts | Inlet valve, sensor board, ice maker assembly | Door flap, auger, dispenser motor |
For compatible GE and Kenmore refrigerators, the WR17X11653 Refrigerator Ice Dispenser Door Flap helps maintain the dispenser opening and supports proper ice dispensing.
If the auger is damaged and cannot move ice toward the dispenser chute, the WR17X11705 Ice Maker Auger can help restore ice movement in compatible GE refrigerators.
Note: If the ice bin already contains ice, do not replace the ice maker assembly before checking the dispenser chute, auger, flap, and dispenser controls.
4. When to Call a Professional
Some ice maker problems can be handled with basic troubleshooting, but professional service is recommended when the issue involves electrical testing, internal wiring, persistent leaks, or cooling-system faults.
Consider calling an appliance technician if:
- The ice maker has no power even though the refrigerator is running normally.
- Electrical wiring, connectors, or control boards appear burned or damaged.
- The freezer cannot maintain the correct temperature.
- The water inlet valve requires electrical testing and you are not comfortable using a multimeter.
- Water continues leaking after checking the supply line and connections.
- The ice maker still does not work after checking the power setting, freezer temperature, water supply, filter, fill tube, sensors, and inlet valve.
- The refrigerator is still under warranty and opening internal components may affect coverage.
Safety Note: Always unplug the refrigerator and shut off the water supply before removing electrical or water-system components. Do not perform live-voltage testing unless you are trained and comfortable working with electrical appliances.
>> Read more: 8 Common Refrigerator Issues and How to Fix Them Effectively
5. Frequently Asked Questions
5.1. Why is my refrigerator not making ice but the water dispenser works?
If the water dispenser still works, the refrigerator is receiving water, but the ice maker may have a separate issue. Check the ice maker setting, fill tube, ice-level sensor, water inlet valve, and ice maker assembly.
5.2. Why is my freezer cold but the ice maker is not making ice?
A freezer can feel cold while still being too warm for reliable ice production. Check the actual temperature and keep it near 0°F (-18°C) unless the manufacturer specifies otherwise. If the temperature is correct, inspect the water supply and ice maker components.
5.3. Why is there no water going into my ice maker?
Common causes include a closed water valve, kinked supply line, clogged filter, frozen fill tube, or faulty water inlet valve. Start with the household water supply and work toward the ice maker.
5.4. How do I reset a refrigerator ice maker?
Reset procedures vary by refrigerator model. Some units use a reset or test button, while others require a control-panel sequence or power cycle. Check the owner's manual for the correct procedure for your model.
A refrigerator not making ice can often be traced to a simple issue such as an incorrect ice maker setting, freezer temperature, restricted water supply, clogged filter, or frozen fill tube. Start with these basic checks before moving on to components such as the water inlet valve, sensors, or ice maker assembly.
Once you identify the faulty component, BlueStars Parts offers refrigerator replacement parts for DIY repairs. Always verify your refrigerator model and original part number before ordering a replacement.
Contact information:
8 The Green, Ste A, Dover, Delaware 19901-3618, United States
Website: https://bluestarsparts.com/
Explore related articles:
How to Fix a Leaky Refrigerator: 6 Common Causes and Fixes
Refrigerator Making Loud Noise: 7 Common Causes & Easy Fixes
Why is My Refrigerator Light Not Working? 5 Causes and Fixes
Fridge Thermostat Not Working? Common Causes & How to Fix
Refrigerator Repair Cost: What Homeowners Should Know
How to Clean Refrigerator Water Dispenser in 6 Simple Steps
Refrigerator Compressor Hot? Easy Troubleshooting Guide
Reference
KitchenAid. (n.d.). Refrigerator ice maker troubleshooting. https://www.kitchenaid.com/pinch-of-help/major-appliances/refrigerator-ice-maker-troubleshooting.html
Maytag. (n.d.). Ice maker not working – Troubleshooting. https://producthelp.maytag.com/Refrigeration/Full-size_Refrigerators/Product_Info/Product_Assistance/Ice_Maker_Not_Working_-_Troubleshooting
Whirlpool. (n.d.). How to reset an ice maker. https://www.whirlpool.com/blog/kitchen/how-to-reset-an-ice-maker.html
Whirlpool. (n.d.). Ice maker troubleshooting: How to fix an ice maker. https://www.whirlpool.com/blog/kitchen/ice-maker-troubleshooting.html


