

A consistent gas range maintenance routine helps keep your burners clean, your flames even, and your kitchen safer. From wiping away food spills after cooking to checking for damaged components, simple maintenance tasks can prevent common performance problems and help extend your appliance's service life. This guide from BlueStars Parts covers a practical maintenance schedule, essential cleaning steps, common gas range problems, and signs that you should call a professional.
1. Why Gas Range Maintenance Matters
Regular gas range maintenance supports even flames, reliable ignition, and safer cooking. Here's what to check:
| Maintenance Benefit | Why It Matters | What to Check |
|---|---|---|
| Even blue flames | Supports steady heat | Flame, burner caps |
| Consistent cooking | Maintains burner performance | Ports, flame pattern |
| Reliable ignition | Reduces ignition problems | Igniter, moisture |
| Efficient gas use | Supports proper combustion | Flame, burner condition |
| Fewer repairs | Detects wear early | Knobs, burner heads |
| Longer appliance life | Reduces residue buildup | Grates, gasket |
| Safer operation | Helps identify hazards | Gas odor, visible damage |
2. Gas Range Maintenance Checklist by Schedule
Use this gas range maintenance checklist as a general guide. Follow your owner's manual for model-specific cleaning methods and service intervals.
| How Often | Task | Why It Matters | DIY Level |
|---|---|---|---|
| After each use | Wipe cooled cooktop | Prevents buildup | Easy |
| After each use | Observe flame color | Detects abnormal flames | Easy |
| Weekly | Clean grates and caps | Removes grease | Easy |
| Weekly | Clean removable knobs | Prevents sticking | Easy |
| Weekly | Clean and dry igniter area | Supports ignition | Easy |
| Monthly | Check burner ports | Maintains even flames | Moderate |
| Monthly | Inspect oven door seal | Detects heat loss | Easy |
| Every 6 months | Visually check accessible gas line | Detects visible damage | Easy |
| As required | Professional gas leak inspection | Identifies leaks | Professional |
| Yearly | Professional gas system check | Verifies safe operation | Professional |
Safety Note: Never move the range to inspect gas connections or perform a leak test if you suspect escaping gas. Leave the area and contact your gas supplier or emergency services from a safe location.
Note: The schedule is a general maintenance guide. Follow the appliance manufacturer's instructions and applicable gas safety requirements.
3. Essential Gas Range Maintenance Tasks
Gas range maintenance helps keep your appliance clean, safe, and working properly. The following tasks cover essential maintenance steps homeowners can perform safely.

Essential gas range maintenance includes cleaning burners, knobs, and other accessible components (Source: BlueStars Parts)
3.1. Wipe the Cooktop After Every Use
Wiping the cooktop after it cools is one of the easiest ways to prevent grease, food particles, and sticky residue from accumulating around the burners. You can follow these steps:
- Step 1: Turn off all burners and let the cooktop cool.
- Step 2: Remove crumbs and loose food debris with a soft cloth.
- Step 3: Wipe with warm, soapy water or an approved cooktop cleaner.
- Step 4: Remove residue with a nonabrasive cloth and dry thoroughly.
Caution: Avoid pouring water into burner openings or igniters. Do not use harsh chemicals or abrasive tools unless approved by the manufacturer.
3.2. Check the Flame Color Every Time You Cook
A properly operating gas burner generally produces a stable blue flame. Brief color variations may occur, but persistent yellow flames, soot, or uneven patterns can indicate a problem.
- Step 1: Observe the flame during normal cooking.
- Step 2: Check for uneven flames, persistent yellow tips, or soot.
- Step 3: If abnormal, turn off the burner and let it cool.
- Step 4: Clean accessible burner parts and check cap alignment.
- Step 5: If the problem persists, stop using the burner and contact a qualified technician.
Safety Note: Persistent yellow flames with soot may indicate a combustion issue. Do not attempt to adjust the gas pressure or air-fuel mixture yourself.
3.3. Soak the Grates and Burner Caps Weekly
Clean removable grates and burner caps regularly to prevent grease and food buildup. Always check which cleaning methods your model permits.
- Step 1: Turn off the range and let all parts cool.
- Step 2: Remove grates and caps as instructed.
- Step 3: Soak compatible parts in warm, soapy water.
- Step 4: Gently scrub with a soft brush or sponge.
- Step 5: Rinse, dry completely, and reinstall correctly.
Caution: Not all grates or burner caps are dishwasher-safe. Avoid soaking uncoated cast iron unless the manufacturer allows it.

Cleaning removable gas range grates and burner caps with warm, soapy water (Source: BlueStars Parts)
3.4. Clear Clogged Burner Ports
Clogged burner ports can cause uneven flames, delayed ignition, or burners that fail to light.
How to Clean:
- Step 1: Turn off the burner and let it cool completely.
- Step 2: Remove the burner cap and other approved removable parts.
- Step 3: Inspect accessible ports for food or grease buildup.
- Step 4: If permitted, gently clear blocked ports with a straight pin or approved tool. Never enlarge the openings.
- Step 5: Remove debris, dry all parts, and reinstall the cap correctly.
Caution: Never use wooden toothpicks or attempt to clean internal gas orifices, valves, or injectors. If the burner still produces uneven flames, arrange professional inspection.
3.5. Pull Off and Wash the Control Knobs
Cleaning removable control knobs helps prevent grease buildup and sticking. Replace damaged knobs if cleaning cannot restore secure operation.
How to Clean:
- Step 1: Turn off all burners and let the cooktop cool.
- Step 2: Remove knobs only if your owner's manual permits.
- Step 3: Wash with mild soap and water, then dry completely.
- Step 4: Wipe around the control shafts without letting water enter, then reinstall the knobs securely.
Safety Note: Never force a stuck knob. If it spins freely or cannot reliably reach OFF, stop using the affected burner and arrange repair.
Recommended Replacement Part
If your Samsung stove knobs are cracked, loose, have unreadable markings, or damaged internal fittings, consider the DG64-00472A / DG64-00347A Samsung Stove Knobs from BlueStars Parts.
These replacement knobs feature reinforced internal rings and D-shaped shaft openings to help restore secure burner control. They fit select Samsung ranges; verify your exact stove model and original part number before ordering.

DG64-00472A / DG64-00347A Samsung Stove Knobs – 5 Pack (Source: BlueStars Parts)
3.6. Keep the Igniter Area Clean and Dry
Moisture, grease, or food debris around the igniter can cause repeated clicking or prevent the burner from lighting.
How to Clean:
- Step 1: Turn off all burners and let the cooktop cool.
- Step 2: Remove visible debris with a soft brush or cloth.
- Step 3: Gently wipe the igniter if permitted by the manual.
- Step 4: Let the area dry completely before using the burner.
- Step 5: If clicking continues or ignition fails, stop troubleshooting and arrange inspection.
Safety Note: Never bend, pull, or strike the igniter. If clicking continues with all knobs OFF, stop using the range and have the ignition system checked.
For more detailed replacement guidance, read our How Do You Replace a Gas Stove Igniter? Step-by-Step Guide.
3.7. Inspect the Oven Door Gasket
A damaged oven door gasket can allow heat to escape, causing longer preheating times or uneven cooking.
- Step 1: Turn off the oven and let it cool completely.
- Step 2: Check the gasket for tears, gaps, loose sections, or flattening.
- Step 3: Confirm that the door closes evenly.
- Step 4: Replace a damaged gasket with a model-compatible part, following the manufacturer's instructions.
Caution: Do not pull, scrub aggressively, or remove the gasket unless the manual permits it.

Inspecting the oven door gasket for wear, gaps, or damage (Source: BlueStars Parts)
3.8. Check for Gas Leak Warning Signs
Gas leaks are serious safety hazards. Homeowners should watch for warning signs and leave gas connection testing to qualified professionals.
- Step 1: Visually check accessible gas supply lines without moving the range.
- Step 2: Look for obvious damage, corrosion, or kinks.
- Step 3: Watch for gas odors or unusual hissing sounds.
- Step 4: Arrange professional inspection if damage or connection problems are suspected.
Emergency Warning: If you smell gas or suspect an active leak, do not perform any tests, operate switches, or use flames. Leave immediately and contact your gas utility or emergency services from a safe location.
4. Common Gas Range Problems Maintenance Can Prevent
Regular cleaning and inspection can help prevent several common gas range problems. However, persistent symptoms may indicate a damaged component or a fault that requires professional diagnosis.

Five common gas range problems that regular cleaning and inspection can help identify (Source: BlueStars Parts)
4.1. Uneven Flames or Flames Missing in Sections
Possible Causes: Food debris, grease, or cleaning residue can block burner ports and interrupt the distribution of gas around the burner. A burner cap that is incorrectly positioned after cleaning can also produce an uneven flame. Worn or damaged burner components may contribute to recurring problems.
How to Fix:
- Step 1: Turn off the burner and let it cool.
- Step 2: Remove the cap and inspect accessible ports.
- Step 3: Clean approved parts, dry them, and reinstall the cap correctly.
- Step 4: If flames remain uneven, stop using the affected burner and arrange inspection.
4.2. Yellow or Orange Flames Instead of Blue
Possible Causes: Persistent yellow or orange flames can result from dirty burner ports, incorrectly seated burner heads, an unsuitable air-to-gas mixture, or other combustion problems. Some brief color variations can occur depending on the fuel and operating conditions, but persistent yellow flames accompanied by soot should not be ignored.
How to Fix:
- Step 1: Turn off the burner and allow it to cool.
- Step 2: Check removable burner parts for dirt, damage, or misalignment.
- Step 3: Clean and dry approved components, then reinstall them correctly.
- Step 4: If yellow flames or soot persist, stop using the burner and contact a qualified technician.
Recommended Replacement Part
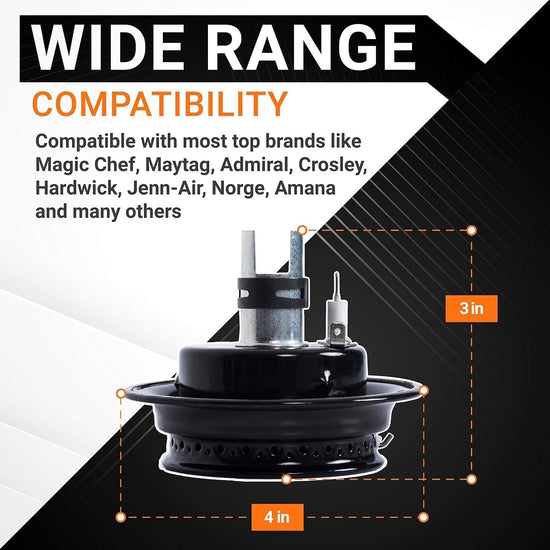
If inspection confirms a severely worn, corroded, or damaged burner head or spark igniter, consider the 3412D024-09 Gas Range Sealed Burner Head & Igniter Assembly from BlueStars Parts. This four-piece set combines sealed burner heads with spark igniters to support reliable ignition and even flame distribution. It is intended for compatible gas ranges; verify your original part number and appliance model before ordering.
For other replacement options, explore Range/Oven Heating-Temperature Parts at BlueStars Parts.
Important: Persistent yellow flames or soot may indicate a combustion or gas-pressure problem rather than a defective burner head. Professional diagnosis is recommended before replacing parts.
3412D024-09 Gas Range Sealed Burner Head & Igniter Assembly – 4 Pack (Source: BlueStars Parts)
4.3. Burner Clicks but Won't Light
Possible Causes: A burner that clicks without lighting may have a wet or dirty igniter, blocked burner ports, or a burner cap that is not properly seated. A failed igniter, ignition switch, wiring fault, or gas-supply issue can produce similar symptoms.
How to Fix:
- Step 1: Turn off the burner and let it cool.
- Step 2: Check for moisture or debris around the igniter.
- Step 3: Clean and dry approved parts, then align the burner cap.
- Step 4: If the burner still won't light, stop further attempts and arrange professional diagnosis.
Safety Note: If you smell gas, leave the area and contact your gas supplier or emergency services from a safe location.
For additional troubleshooting, see our Gas Stove Keeps Clicking guide.
4.4. Knobs That Stick, Spin Loosely, or Won't Align
Possible Causes: Grease and food residue can make knobs difficult to turn, while cracked plastic, worn fittings, or a damaged metal ring can cause a loose fit. A fault in the underlying control mechanism may also prevent a knob from operating correctly.
How to Fix:
- Step 1: Turn off the appliance and let it cool.
- Step 2: Remove the knob only if permitted by the manual.
- Step 3: Clean, dry, and reinstall the knob securely.
- Step 4: If it remains loose, stuck, or cannot reach OFF reliably, stop using the affected burner and arrange repair.
Important: If the control shaft or gas valve is damaged, replacing the knob alone will not resolve the problem.
4.5. Oven Temperature Runs Uneven or Too Low
Possible Causes: An oven that cooks unevenly or fails to reach the expected temperature may have a damaged door gasket, an incorrectly positioned oven rack, a faulty temperature sensor, or a problem with the burner or thermostat. Frequent door opening can also cause temperature fluctuations.
How to Fix:
- Step 1: Check oven rack placement and avoid overcrowding.
- Step 2: Inspect the door gasket once the oven is cool.
- Step 3: Verify oven temperatures using an appropriate thermometer and the manufacturer's instructions.
- Step 4: If temperatures remain inconsistent, have the sensor, burner, and control system inspected.
For more detailed troubleshooting, read our Oven Not Heating Up? 5 Common Causes & How to Fix It guide.

Door gasket damage or faulty heating components can contribute to inconsistent oven temperatures (Source: BlueStars Parts)
Explore More: Oven Not Heating Up? 5 Common Causes & How to Fix It
5. Gas Range Maintenance: When Should You Call a Professional?
Basic cleaning can resolve some gas range problems, but gas supply, combustion, and internal component faults require professional attention.
Contact a Qualified Technician If:
- Persistent yellow flames or soot: Abnormal flames remain after cleaning.
- Repeated ignition failure: Burners click but won't light.
- Damaged controls: Knobs stick, spin freely, or cannot reach OFF.
- Uneven oven heating: Temperature problems continue after basic checks.
- Damaged gas components: Supply lines, valves, or regulators show signs of trouble.
- Internal component failure: Igniters, sensors, gas valves, or wiring require testing.
Emergency Warning: If you smell gas or suspect a leak, leave immediately and contact your gas utility or emergency services from a safe location. Never attempt leak testing or repairs yourself.
6. FAQs: Gas Range Maintenance
6.1. How Often Should You Deep Clean a Gas Range?
A practical starting point is to deep clean removable grates and burner caps weekly, while cleaning the cooktop after each use once it has cooled. Clean burner ports when inspection reveals blockages, and check the oven door gasket monthly. Adjust the schedule according to how often you cook and the manufacturer's instructions.
6.2. Why Is My Gas Stove Flame Yellow Instead of Blue?
A yellow flame can indicate dirty burner ports, a burner cap that is not seated correctly, or a combustion problem. Small variations may occur with certain fuels or operating conditions, but persistent yellow flames or soot should be investigated. Turn off the burner, clean accessible components according to the manual, and contact a qualified technician if the problem continues.
6.3. What Should I Use to Clear Clogged Burner Ports?
If the manufacturer permits it, use a straight pin, needle, or appropriately sized small-gauge wire to gently remove debris from accessible burner ports. Do not use a wooden toothpick, force a tool into the opening, or enlarge the ports. Turn off the burner, let it cool completely, and dry all components before reassembly.
6.4. How Do I Know If My Gas Range Has a Leak?
Warning signs include a sulfur-like gas odor, an unusual hissing sound, or other indications that gas may be escaping. If you suspect a leak, stop using the range, avoid flames and electrical switches, leave the area, and contact your gas supplier or emergency service from a safe location.
6.5. Can I Put Gas Range Grates and Burner Caps in the Dishwasher?
Some grates are dishwasher-safe, but many burner caps are not. Compatibility depends on the material, coating, and appliance model, so check the owner's manual before washing either component in a dishwasher. When in doubt, use warm, soapy water, rinse thoroughly, and dry the parts completely before reinstalling them.
Conclusion
Consistent gas range maintenance helps keep burners clean, supports reliable ignition, and makes it easier to identify worn or damaged components before they cause more serious problems. By following a regular cleaning schedule, checking flame behavior, and arranging professional inspections when needed, you can maintain cooking performance while prioritizing kitchen safety.
When cleaning or inspection reveals a damaged knob, burner head, or other replaceable component, choosing a compatible part is essential. Explore BlueStars Parts' Range/Oven Parts collection to find components for common issues, from worn burner heads and faulty igniters to damaged control knobs and door gaskets. Replacing worn parts can help restore reliable ignition, consistent heating, and better cooking performance.
Contact Information:
8 The Green, Ste A, Dover, Delaware 19901-3618, United States
Website: https://bluestarsparts.com/
References
- Samsung. (n.d.). Flame Issues on Samsung Gas Cooktop or Range.
- Whirlpool. (n.d.). How to Clean Gas Stove Top Grates and Burners.
- Whirlpool. (n.d.). Cleaning Gas Cooktop Burners and Ports.
- U.S. Consumer Product Safety Commission. (2010). Certain Older Gas Connectors May Be Dangerous.
Explore Related Articles
Explore more gas range and oven troubleshooting guides from BlueStars Parts:
- Gas Oven Not Lighting? Causes & How to Fix It Yourself Today – Identify common gas oven ignition problems.
- Stove Burner Not Working? Here Are Quick DIY Fixes – Troubleshoot burner ignition and heating failures.
- Oven Troubleshooting: 9 Common Problems and How to Fix Them – Explore common oven heating and control-system issues.


