
When splatters, steam, and sticky grease build up after everyday cooking, your microwave filter can quickly become clogged and greasy. Over time, this traps odors, restricts airflow, and puts extra strain on the motor. Knowing how to properly clean microwave filter is a simple yet essential maintenance step every homeowner should have in their routine. At BlueStars Parts, we're dedicated to helping you keep your appliances running like new with the right parts, tools, and expert guidance.
|
Key Takeaway Cleaning a microwave usually takes about 20-30 minutes, plus additional drying time before reinstalling the filter.
If your microwave uses a charcoal filter, do not wash it. Replace it every 6–12 months or whenever cooking odors persist. |
1. Microwave Filter Maintenance Schedule
| Filter Type | Maintenance | Recommended Frequency | Why It Matters |
|---|---|---|---|
| Grease filter | Clean | Every month, or sooner if grease buildup is visible or ventilation seems weaker | Regular cleaning prevents grease from clogging the exhaust system, improves airflow, and helps protect the microwave fan. |
| Charcoal filter | Replace (do not wash) | Every 6–12 months, or sooner if cooking odors persist | Charcoal filters absorb odors but lose effectiveness over time and cannot be restored by washing. |
2. Microwave Filter Cleaning Supplies Checklist
Before cleaning your microwave's grease filter, it’s important to gather the right supplies to make the process easier and safer. Most experts recommend using gentle degreasers and non-abrasive cleaning tools to avoid damaging the metal mesh filter.
|
Item |
Why it helps |
|
Hot water |
Helps dissolve and loosen greasy buildup from the filter mesh, making it easier to clean. |
|
Grease-cutting dish soap |
Breaks down tough grime and cooking grease more effectively during soaking. |
|
Baking soda |
Boosts the cleaning power of the soaking solution, especially for filters that have not been cleaned in a while. |
|
Soft-bristle brush |
Helps scrub away stuck-on grease without scratching or damaging the metal mesh. |
|
Microfiber cloths or paper towels |
Useful for drying the filter completely before reinstalling it. |
If your microwave filter is too greasy, damaged, or difficult to clean completely, replacing it can help improve ventilation and reduce cooking odors. The W10208631A Microwave Grease Filter Replacement comes in a convenient 5-pack and is designed for compatible microwave models.
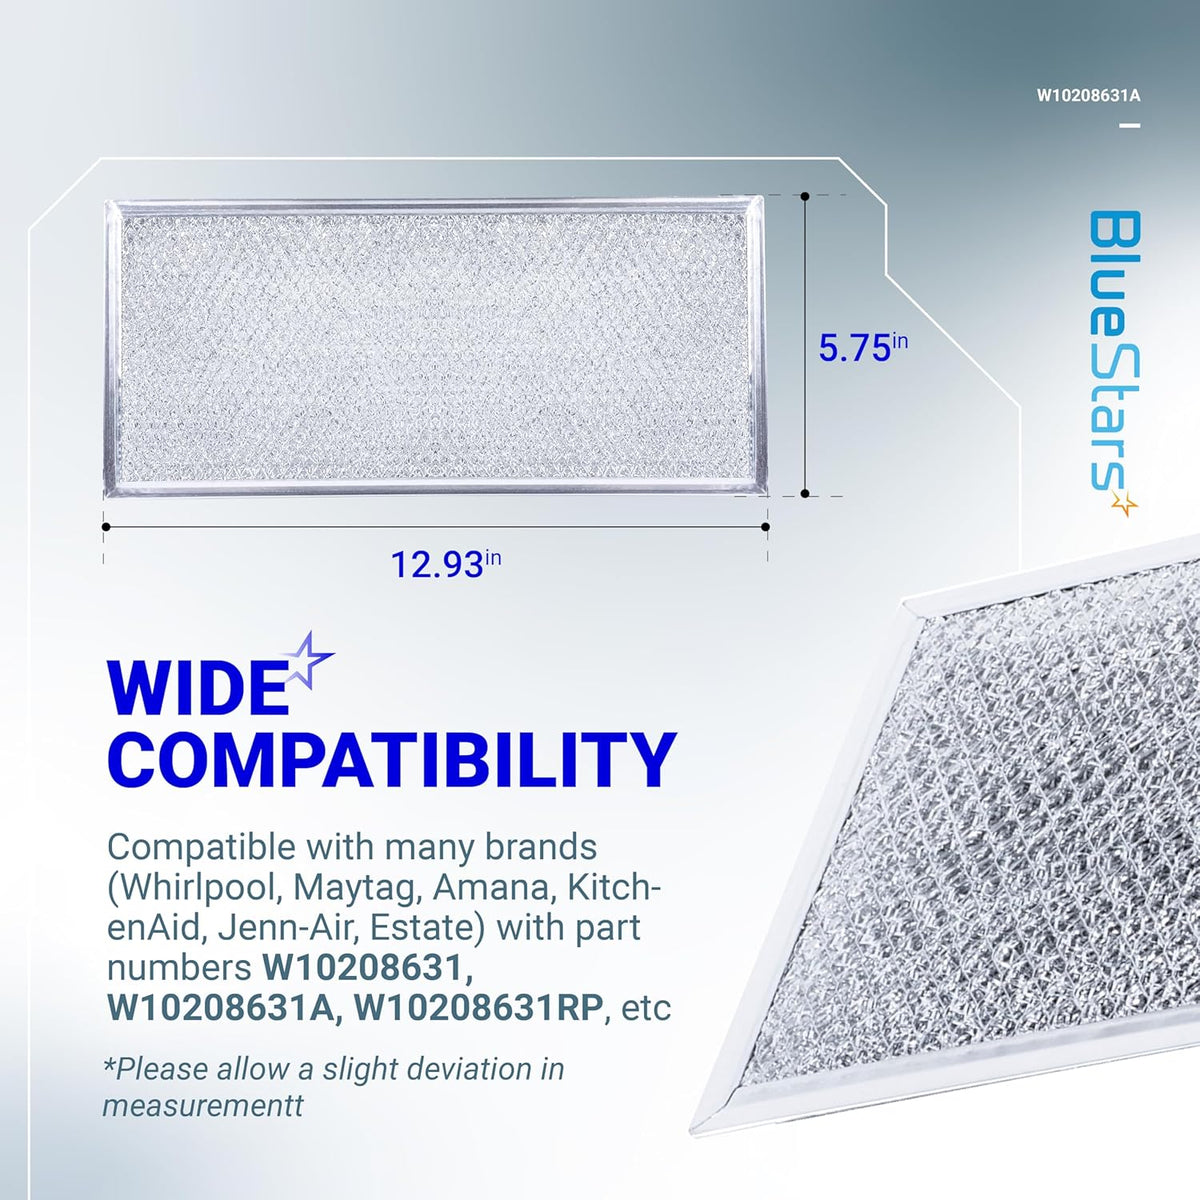
W10208631A Microwave Grease Filter Replacement (Source: Bluestars Parts)
Regular filter maintenance helps prevent common microwave problems caused by restricted airflow, grease buildup, and poor ventilation.
3. How to Clean a Microwave Filter (Step-by-Step Guide)
Step 1: Before You Start
Before cleaning your microwave filter:
- Unplug the microwave or switch off the circuit breaker.
- Allow the appliance to cool completely.
- Wear gloves if the filter has sharp aluminum edges.
- Check your owner's manual if you're unsure how the filter is removed.
Step 2: Remove the grease filter
On most over-the-range (OTR) microwaves, the reusable grease filter is located underneath the appliance above the cooktop. Release the locking tab or retaining clip and carefully slide the filter out.
If you're unsure how the filter is secured, consult your owner's manual before removing it.

Remove the filter from its housing by gently sliding or popping it out (Source: Bluestars Parts)
Step 3: Soak the filter
Fill a sink or basin with hot water and a generous amount of liquid dish soap. For heavy grease buildup, add about ¼ cup of baking soda or white vinegar. Let the filter soak for 10–30 minutes so the grease softens before scrubbing.
Step 4: Gently scrub away grease buildup
Use a soft-bristle brush or an old toothbrush to gently scrub grease from both sides of the metal mesh. Avoid using steel wool or abrasive pads, which can damage the filter.

Use gentle pressure and take care not to bend the filter or filter frame (Source: Bluestars Parts)
Step 5: Rinse the filter thoroughly
Rinse the filter under hot running water until all grease, baking soda, and soap residue have been removed.
Step 6: Let the filter dry completely
Allow the filter to air dry completely before reinstalling it. Drying time varies depending on humidity and airflow. Never reinstall a damp filter because trapped moisture can affect ventilation performance.

Drying time is a minimum of 4 hours for aluminum filters (Source: Bluestars Parts)
Step 7: Reinstall the clean grease filter
Slide the clean, dry filter back into its housing until it locks securely into place. A properly installed filter helps maintain efficient airflow and prevents grease from entering the vent system.
>>> Read more: How To Clean & Maintain a Microwave: The Ultimate DIY Guide
4. Grease Filter vs Charcoal Filter: Which One Should You Clean?
Most over-the-range (OTR) microwaves have one or two filters depending on how they vent air. A reusable grease filter captures grease and cooking particles, while a charcoal filter absorbs cooking odors in recirculating models. Because these filters serve different purposes, they also require different maintenance.
| Feature | Grease Filter | Charcoal Filter |
|---|---|---|
| Purpose | Captures grease and cooking particles | Reduces cooking odors |
| Location | Underneath the microwave | Behind the upper vent grille |
| Material | Aluminum or stainless steel mesh | Activated charcoal |
| Washable | ✅ Yes | ❌ No |
| Maintenance | Clean about once a month | Replace every 6–12 months |
| Replace When | Bent, rusty, damaged, or won't come clean | Odors persist or the filter reaches the recommended replacement interval |
If your microwave uses a GE-compatible charcoal filter, the JX81H/WB02X10956 Microwave Charcoal Filter is a reliable direct replacement that fits securely and restores your microwave's odor-filtering performance right away.
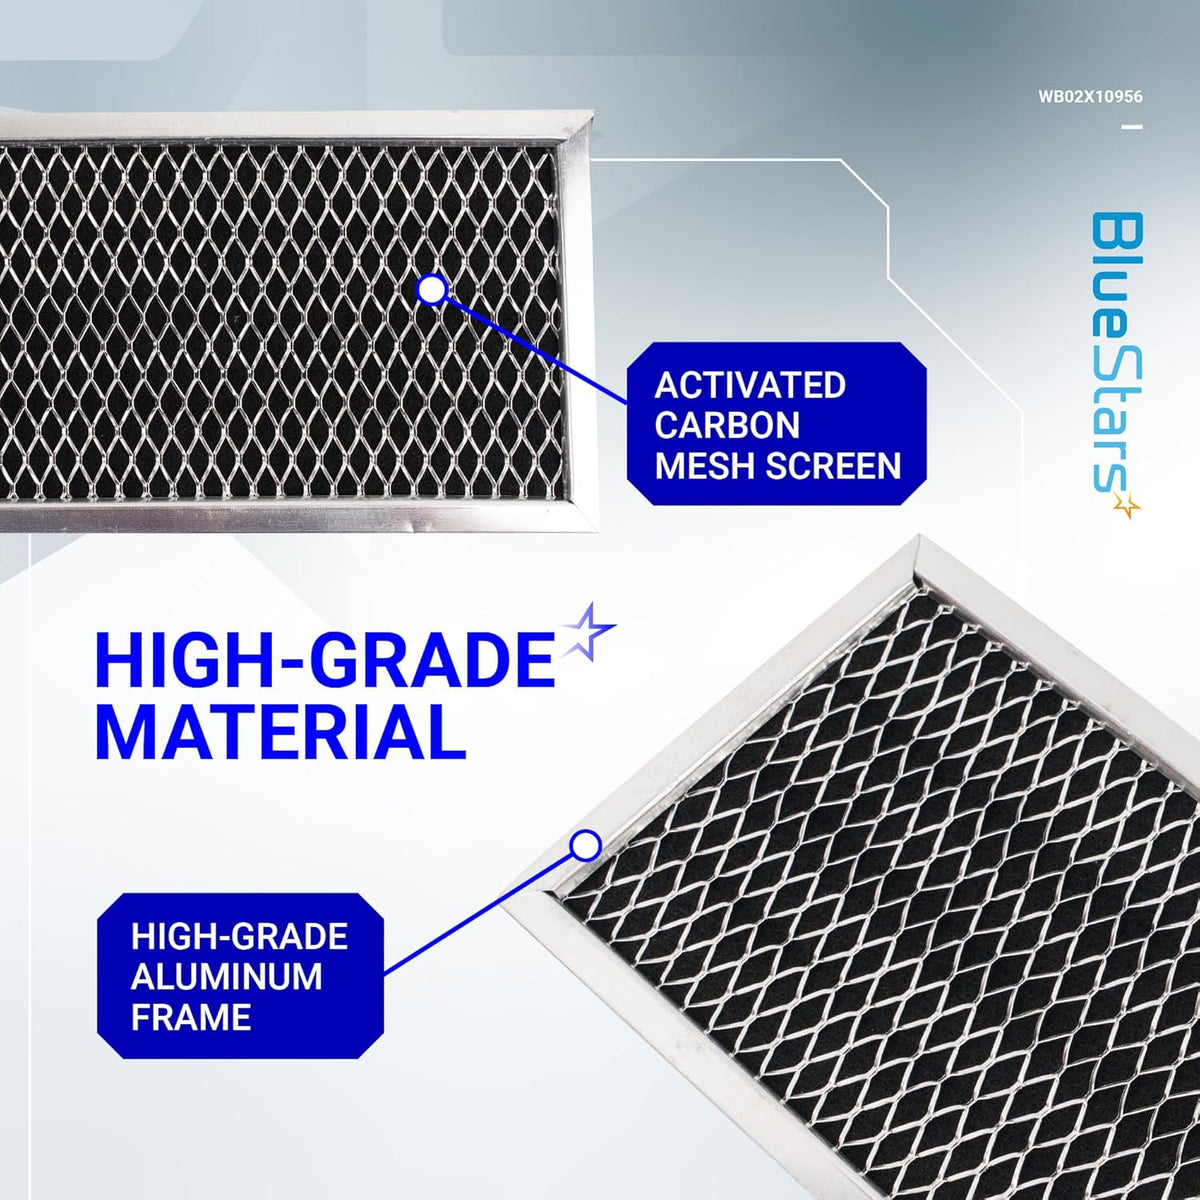
JX81H/WB02X10956 Microwave Charcoal Filter (Source: Bluestars Parts)
For Whirlpool and Maytag over-the-range models, 8206230A Microwave Charcoal Filter is a compatible, high-quality option that makes filter replacement quick and hassle-free.

8206230A Microwave Charcoal Filter (Source: Bluestars Parts)
4. Frequently Asked Questions
4.1. Where are microwave filters located?
Microwave filters are usually located underneath over-the-range microwaves, right above the stovetop. These are typically grease filters designed to trap oil, smoke, and cooking particles. Some models also have charcoal filters placed behind the front vent grille or above the microwave door to help remove odors from recirculated air.
4.2. Can microwave filters be washed in the dishwasher?
Many metal grease filters can be safely cleaned in the dishwasher, especially aluminum or stainless steel mesh filters. However, charcoal filters are not washable and must be replaced when dirty. Since cleaning instructions vary by brand and model, it is always best to check the microwave’s user manual before using a dishwasher.
4.3. Do All Microwaves Have Filters?
Not all microwaves have filters. Countertop microwaves often do not include ventilation filters because they are only designed for heating food. Over-the-range microwaves, on the other hand, almost always have grease and sometimes charcoal filters because they also function as kitchen ventilation systems.
Keeping your microwave filter clean is an easy but important step in maintaining strong ventilation, reducing kitchen odors, and helping your microwave run more efficiently. If your current filter is damaged or too clogged to restore, Bluestars Parts offers high-quality replacement microwave filters designed to fit a wide range of popular microwave models.
Contact information:
8 The Green, Ste A, Dover, Delaware 19901-3618, United States
Website: https://bluestarsparts.com/