

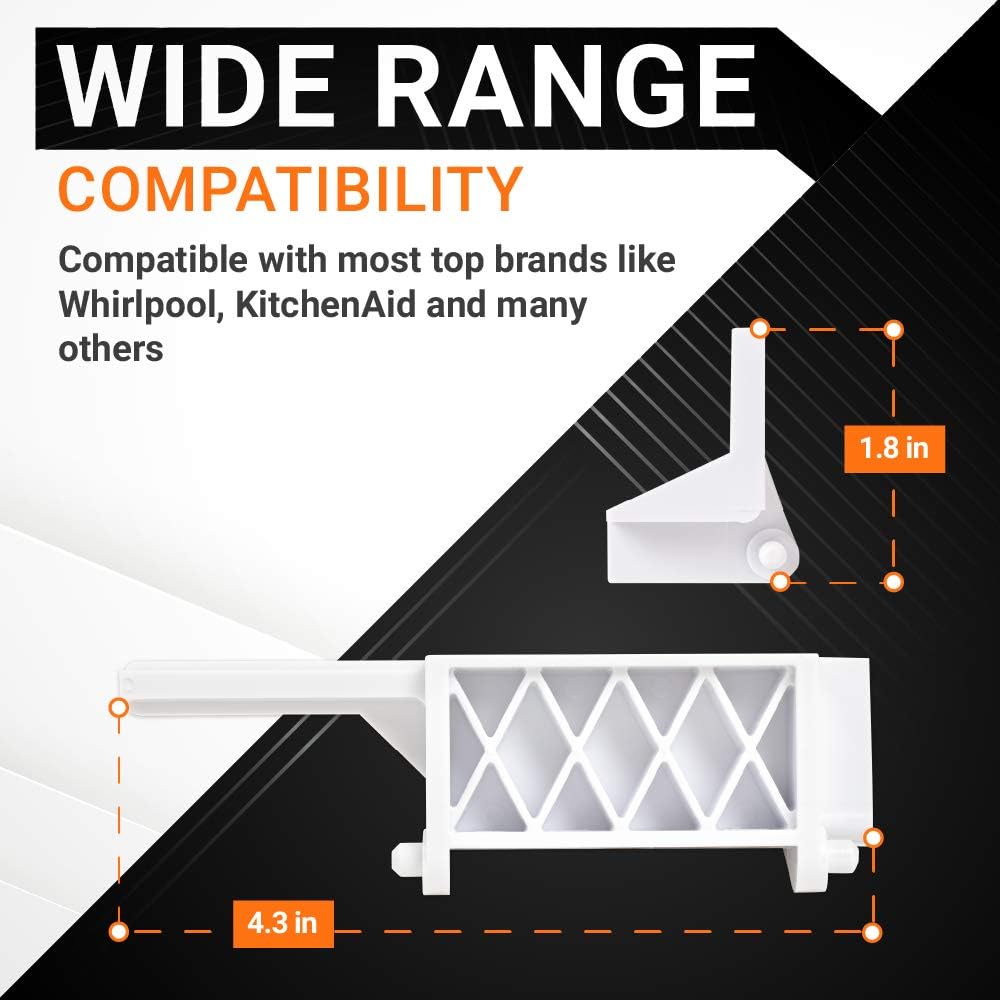


8205451 Microwave Latch Bracket - For Whirlpool & KitchenAid Microwaves
0.00
Regular price
$17.39
Regular price
Save 11%
$19.47
Sale price
$17.39
Fast Delivery
Delivery options available at checkout
30 Day Returns
Return Policy
CONFIRM THIS PART FITS
Enter appliance or equipment model number to verify compatibility with this part
Replaces Part Numbers
8205451 / WP8205451 Microwave Door Latch & Switch Bracket
Key Features
- Secure Interlock Switch Housing: Specifically engineered to hold the door micro-switches in precise alignment, ensuring the safety interlock system correctly detects when the door is fully closed and locked.
- Reinforced Structural Frame: Manufactured from a high-density, heat-stabilized polymer designed to withstand the mechanical stress and vibration of the microwave door being opened and closed thousands of times.
- Precision-Molded Latch Receivers: Features exact-tolerance openings for the door hooks, providing a smooth, positive latching action that prevents the door from feeling loose or "sagging" during operation.
- Safety-Critical Component: Acts as the foundation for the microwave’s safety circuit; the bracket ensures that switches are depressed in the correct sequence to prevent accidental microwave leakage.
Replaces / Cross-Reference Part Numbers
- WP8205451
- AP6012058
- PS11745265
- W10298900
- 8205451
- AP3776470
- PS972837
- 1065792
- AH972837
- EAP11745265
Compatibility & Fitment
This latch bracket is a standard internal component for many Whirlpool-manufactured over-the-range and countertop microwaves. Key compatible brands include:
- Whirlpool & KitchenAid: Fits hundreds of models including MH1140XMQ, KHMS155LSS, WMH31017AS, and the Velos series.
- Maytag & Amana: Compatible with various MMV and AMV series units (e.g., MMV1153AAW, AMV1150VAS).
- Kenmore (665 Series): Fits many 665-prefix high-end microwaves produced by Whirlpool for Sears.
- Estate & Roper: Direct fit for dozens of budget-friendly models utilizing the standardized Whirlpool latch assembly.
- Note: This bracket is located inside the cabinet behind the control panel. It is not the handle or the hooks on the door itself.
When to Replace
- Microwave Won't Start: The most common symptom; if the plastic mounting tabs on the bracket are cracked, the switches won't align with the door hooks, preventing the "Start" signal from engaging.
- Microwave Runs with Door Open: **EXTREMELY UNSAFE:** This indicates the bracket is broken or warped, causing a switch to be permanently stuck in the "closed" position. Replace immediately.
- Door Won't Stay Latched: If the internal receiver slots are worn or snapped, the door hooks won't catch properly, causing the door to pop open during a cycle.
- Intermittent Power: Vibration during a cycle causes the door switches to lose contact because the bracket is loose or damaged.
- Broken Plastic Tabs: Upon inspection, you see visible cracks or missing pieces of plastic where the micro-switches are supposed to snap into place.
Installation Tips
- Safety First: You MUST unplug the microwave. **DANGER:** Microwaves contain a high-voltage capacitor that can store a lethal charge even when unplugged. Do not touch internal electrical components without discharging the capacitor.
- Accessing the Bracket: You will need to remove the outer cabinet/wrapper and the control panel to access the screws holding this bracket to the front frame.
- Switch Transfer: Take a photo of the wiring and switch positions before removal. Carefully unclip the 2 or 3 micro-switches from the old bracket and snap them into the exact same positions on the new 8205451.
- Test the Latch: Before reassembling the outer cabinet, manually close the door to ensure the hooks enter the bracket cleanly and that you hear the distinct "click" of the switches being depressed.
- Alignment Check: Ensure the bracket is screwed in tightly. If it is misaligned by even a few millimeters, the safety interlock circuit may fail to complete, and the microwave will not heat.
Suggestions
Common Model Number Locations
Need help finding your model number? Select your appliance or lawn equipment below for location diagrams

- Above the refrigerant valves on the back of the air conditioner
- On the side of the unit near the run capacitor or electrical lines that go into your home

- On either side of the exterior
- On the back of the unit where the power cord is located

- In the cool air exhaust port
- To the left of the fan opening, on the weather barrier
- Below the control panel
- On either side of the exterior
- Behind the front grill on the frame

- On the door frame
- On the inside of the tub wall
- Behind the control panel
- On the door
- Inside the edge of the unit

- On the back exterior
- On the door
- On the side of hose storage
- Inside the edge of the unit

- On inside of the door
- On the door frame
- On the back exterior of the unit
- On the exterior side of the unit

- Behind the control panel
- On the inside of the door
- On the door frame
- On the exterior side of the unit

- At the top of the unit
- On the inside of the dryer door
- On the door frame
- Under the washer lid
- On either side of the exterior

- On the back exterior of the unit
- On the door frame
- On the exterior side of the unit
- On interior wall
- On the control panel
- On side of door

- On the right-hand side of the vent, under the control panel
- On the interior wall of the microwave (microwave model number only)
- On the door frame
- On the rear panel

- On the exterior back of the unit

- Inside the top part of the vent duct (in down-draft models)
- Underneath a burner
- Underneath a knob
- Underneath the cooktop (lift-up style)
- Bottom of cooktop

- On an exterior wall
- On an inside wall
- On the door frame

- On the right-hand side of the vent, under the control panel
- On the interior wall of the microwave (microwave model number only)
- On the door frame
- On the rear panel

- Behind the control panel
- Under the front surface unit
- On the door frame
- Interior side panel
- On the exterior of the unit
- On the inside of the lower storage compartment wall

- On top the hood
- Behind the filter
- Under the hood

- On the inside of the door
- On the exterior back of the unit
- Inside on the rear wall
- On the exterior side of the unit

- On door jamb
- On rear of frame
- Behind front panel

- On ceiling of refrigerator
- On interior wall
- On the inside of the door
- Behind crisper drawer
- Behind kickplate

- On ceiling of refrigerator
- On interior wall
- On door frame
- Behind crisper drawer
- Behind kickplate

- On ceiling of freezer
- On interior wall
- On the inside of the door
- Behind kickplate

- On the exterior side of the unit
- On inside of the door
- On the door frame
- On the back exterior of the unit
- On the front exterior of the unit

- On the control panel
- Inside the lid
- Under the lid on the frame
- On the exterior of the unit

- At the top of the unit
- On the inside of the dryer door
- On the door frame
- Under the washer lid
- On either side of the exterior

- On the top center of heater
- On the exterior of the unit

- On the starter housing
- On the side of the housing, behind the top handle
- On the side of the motor housing
- Near the rear grip

- On the top or sides of the engine housing
- On the gas tank
- On the recoil housing

- On the handle bars
- On top of the engine cover
- Near discharge chute, often behind chute flaps
- On rear of the deck, behind the engine

- Dash panel
- Back of mower/rear bumper
- Underside of the seat
- Lower side of hood, near engine
- Frame (beneath the seat, footrest)
- Mower deck

- Underside of the seat
- Frame beneath or near the seat
- Back of mower/rear bumper
- Lower left side between gas tank and mower deck
- Under the foot plate

- On the rear of the blower
- Inside of vacuum canister
- Side of the motor housing
- On the rear base of the vacuum
- On the bottom of the belly of the vacuum

- On the frame near the engine
- On the side of the auger housing
- On the lower rear of the snow blower between wheels

- On the side of the motor housing
- On the shaft
Select an appliance to see where its model number is located.
