

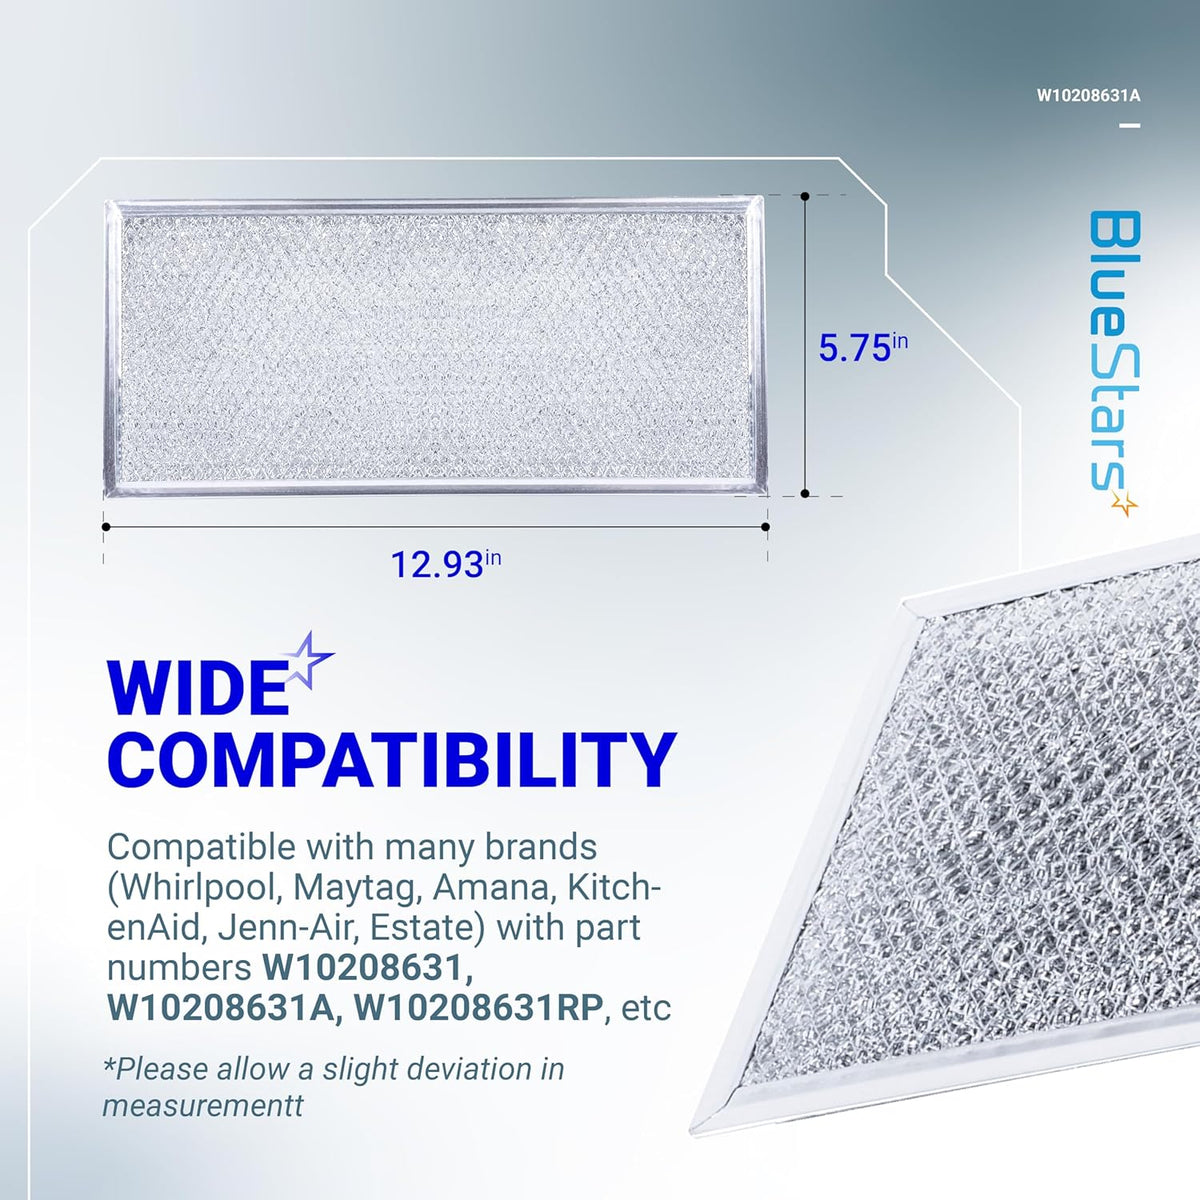


W10208631A Microwave Grease Filter Replacement 5.78" x 12.91" - For Whirlpool GE Microwaves - 5 Pack
0.00
Regular price
$21.47
Regular price
Save 11%
$24.04
Sale price
$21.47
Fast Delivery
Delivery options available at checkout
30 Day Returns
Return Policy
CONFIRM THIS PART FITS
Enter appliance or equipment model number to verify compatibility with this part
Replaces Part Numbers
W10208631A Microwave Grease Filter (5.78" x 12.91")
Key Features
- Enhanced Aluminum Mesh: Constructed with multiple layers of expanded aluminum to provide a high surface area for trapping grease, soot, and steam, preventing them from clogging the internal venting system.
- High Airflow Efficiency: Specifically designed to allow maximum air extraction while maintaining filtration standards, ensuring your over-the-range microwave or vent hood operates at peak suction power.
- Washable and Reusable: The aluminum frame and mesh are resistant to rust and can be cleaned periodically with warm water and degreasing soap to maintain filtration efficiency.
- Foldable Metal Pull Tab: Features a durable, integrated pull tab for easy, tool-free installation and removal, making regular maintenance faster and more convenient.
- Heat-Resistant Construction: Built to withstand the high temperatures generated by stovetop cooking directly beneath the microwave without warping or degrading.
Replaces / Cross-Reference Part Numbers
- AP5617368
- PS3650910
- 2304686
- W10208631
- W10208631RP
- AH3650910
- EA3650910
- EAP3650910
Compatibility & Fitment
This grease filter is widely used in Whirlpool-built and GE over-the-range microwaves. Key compatible models include:
- Whirlpool: Fits many WMH series models including WMH31017AS, WMH31017AW, WMH31017AB, WMH32519AS, and WMH53520AS.
- GE (General Electric): Compatible with JVM and CVM series such as JVM3160RFSS, JVM3160DFWW, and JVM3160DFCC.
- Maytag: Fits specific MMV series units including MMV1174DS and MMV4205DS.
- Amana & Estate: Direct fit for many AMV and KHMS series over-the-range microwaves.
- Note: Always measure your existing filter's length and width before purchasing, as OTR microwaves can have different filter slot sizes even within the same model series.
When to Replace
- Sticky or Gummy Residue: If the filter feels excessively sticky even after a deep soak in degreaser, the internal layers are likely saturated with old oil.
- Reduced Suction: If steam from your stovetop is no longer being pulled into the microwave vent, the filter is likely clogged with grease and dust.
- Bent or Warped Frame: If the aluminum frame is twisted or dented, it may not sit flush in the mounting bracket, allowing unfiltered air to bypass the mesh.
- Discolored Mesh: Severe yellowing or dark brown staining that won't wash off indicates that the aluminum has been heat-damaged or permanently fouled by cooking oils.
- Standard Maintenance: To protect your microwave's exhaust motor, it is recommended to clean these filters once a month and replace them every 6 to 12 months depending on cooking frequency.
Installation Tips
- Safety First: Ensure the microwave fan is turned off and the cooktop below is cool to the touch before reaching for the filters.
- Correct Orientation: PRO TIP: Most W10208631A filters are directional. Slide the side without the tab into the rear or side slot first, then pivot the tabbed side into the locking clip.
- Cleaning Recommendation: To extend the life of your filters, soak them in a mixture of hot water and a high-quality grease-cutting dish soap (like Dawn) for 15 minutes before rinsing.
- Dry Completely: Always allow your filters to air dry completely before reinstalling them. Moisture trapped in the mesh can be pulled into the fan motor, potentially causing electrical issues.
- Check the Top Vent: While you are maintaining the grease filters, check the top vent grille of your microwave for dust buildup to ensure proper air circulation for the internal electronics.


-

ELEVATE VENTILATION SYSTEM
W10208631A Grease Filter blocks grease and debris from entering your over-range microwave's ventilation, keeping your kitchen air clean -

FIX MICROWAVE'S SYMPTOMS
Odors. Grease buildup. Poor venting from the microwave -

SAVING SOLUTION
Affordable alternative to original filters with premium construction, BlueStars W10208631A Grease Filters perform just as well as the original -

EASY TO INSTALL
Replacing your 13x6 microwave grease filter is easy - just slide out the old one and insert the new one. No tools needed.

HIGH-GRADE ALUMINUM
Featuring an upgraded 6-layer metal mesh design and durable aluminum construction.

SUPER FILTRATION AS ORIGINAL PARTS
Replace part # 2304686, AP5617368, W10208631, W10208631A, W10208631RP, W10208631, AH3650910, EA3650910, PS3650910, PD00004371
Compatible Models
Locate the model number of your appliance or equipment on the manufacturer's label and use it to check compatibility before ordering
Loading compatible models…
Manufacturer
BlueStars
Part Number
W10208631A
Item Weight
2.46 ounces
Package Dimensions
12.99 x 5.91 x 0.39 inches
Material
Aluminum
Included Components
5 x W10208631A Over-the-range Microwave Hood Vent Grease Filter
FAQs
Suggestions
Common Model Number Locations
Need help finding your model number? Select your appliance or lawn equipment below for location diagrams

- Above the refrigerant valves on the back of the air conditioner
- On the side of the unit near the run capacitor or electrical lines that go into your home

- On either side of the exterior
- On the back of the unit where the power cord is located

- In the cool air exhaust port
- To the left of the fan opening, on the weather barrier
- Below the control panel
- On either side of the exterior
- Behind the front grill on the frame

- On the door frame
- On the inside of the tub wall
- Behind the control panel
- On the door
- Inside the edge of the unit

- On the back exterior
- On the door
- On the side of hose storage
- Inside the edge of the unit

- On inside of the door
- On the door frame
- On the back exterior of the unit
- On the exterior side of the unit

- Behind the control panel
- On the inside of the door
- On the door frame
- On the exterior side of the unit

- At the top of the unit
- On the inside of the dryer door
- On the door frame
- Under the washer lid
- On either side of the exterior

- On the back exterior of the unit
- On the door frame
- On the exterior side of the unit
- On interior wall
- On the control panel
- On side of door

- On the right-hand side of the vent, under the control panel
- On the interior wall of the microwave (microwave model number only)
- On the door frame
- On the rear panel

- On the exterior back of the unit

- Inside the top part of the vent duct (in down-draft models)
- Underneath a burner
- Underneath a knob
- Underneath the cooktop (lift-up style)
- Bottom of cooktop

- On an exterior wall
- On an inside wall
- On the door frame

- On the right-hand side of the vent, under the control panel
- On the interior wall of the microwave (microwave model number only)
- On the door frame
- On the rear panel

- Behind the control panel
- Under the front surface unit
- On the door frame
- Interior side panel
- On the exterior of the unit
- On the inside of the lower storage compartment wall

- On top the hood
- Behind the filter
- Under the hood

- On the inside of the door
- On the exterior back of the unit
- Inside on the rear wall
- On the exterior side of the unit

- On door jamb
- On rear of frame
- Behind front panel

- On ceiling of refrigerator
- On interior wall
- On the inside of the door
- Behind crisper drawer
- Behind kickplate

- On ceiling of refrigerator
- On interior wall
- On door frame
- Behind crisper drawer
- Behind kickplate

- On ceiling of freezer
- On interior wall
- On the inside of the door
- Behind kickplate

- On the exterior side of the unit
- On inside of the door
- On the door frame
- On the back exterior of the unit
- On the front exterior of the unit

- On the control panel
- Inside the lid
- Under the lid on the frame
- On the exterior of the unit

- At the top of the unit
- On the inside of the dryer door
- On the door frame
- Under the washer lid
- On either side of the exterior

- On the top center of heater
- On the exterior of the unit

- On the starter housing
- On the side of the housing, behind the top handle
- On the side of the motor housing
- Near the rear grip

- On the top or sides of the engine housing
- On the gas tank
- On the recoil housing

- On the handle bars
- On top of the engine cover
- Near discharge chute, often behind chute flaps
- On rear of the deck, behind the engine

- Dash panel
- Back of mower/rear bumper
- Underside of the seat
- Lower side of hood, near engine
- Frame (beneath the seat, footrest)
- Mower deck

- Underside of the seat
- Frame beneath or near the seat
- Back of mower/rear bumper
- Lower left side between gas tank and mower deck
- Under the foot plate

- On the rear of the blower
- Inside of vacuum canister
- Side of the motor housing
- On the rear base of the vacuum
- On the bottom of the belly of the vacuum

- On the frame near the engine
- On the side of the auger housing
- On the lower rear of the snow blower between wheels

- On the side of the motor housing
- On the shaft
Select an appliance to see where its model number is located.
